Are you ready to make your text more interesting? How about making your text follow a curved line? You’re in the right spot! Follow along as I show just how simple it is to make wavy text Silhouette Studio.
Supplies:
Step 1: Make a Wavy Line
On the left side grab the “Draw a Curve Shape” tool under the line tools. Turn the grid lines on to help make a “perfect” curved line.

Tap the mouse where you want the line to start. Then go down 1 grid line and over 3 and tap again. Now go up 2 lines and over 3 grid lines and tap again. Continue doing this to make a nice wavy line. To adjust the curve double tap on the lines and adjust the anchor points.

Step 2: Write Out Your Text
Use the type tool and write out the word or phrase you want to make curved.
Step 3: Add the Text to the Curve
Double-tap on the text to get back to the editing box. Here you will see a white circle with black arrows in the bottom left corner. Click and drag that circle to the line. This will bring the text to the line and take its form.

Drag that circle along the line to change where the text falls across the curve. Use the slider to adjust the height of where the text falls along the line – above the line, on the line, below the line.
Step 4: Convert to Path
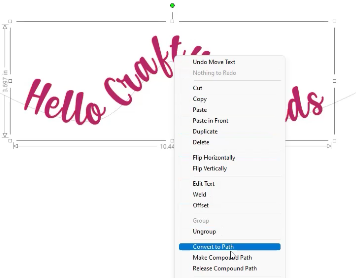
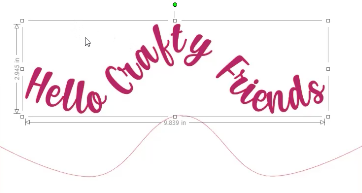
When the text is where you like it, right-click your mouse and select convert to path. The text will no longer be editable but it will hold the curvature of the line.

You will be able to use that same line again to make more text. Once you have all you need, delete the line.

Check out the video below for the full details.


