Are you tired of wasting that precious vinyl and cardstock? I have a trick for you that will help you save valuable space and leave you with bigger scraps you can actually use! Learn how to use the nesting tool in Silhouette Studio! This is another great feature for those who have the Designer’s Edition or more.
The idea is to fit all the pieces onto the cutting mat in the most effective way possible. It can be compared to making a puzzle.
I used to spend endless time rotating my designs to get them all to fit. Now with the nesting tool, the work is done for me!
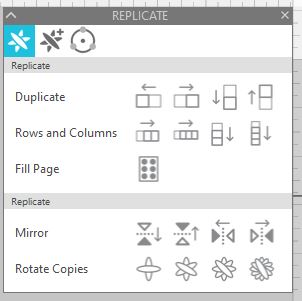
Let’s compare using the fill the page button with the nesting tool. Click on your design, open the replicate panel, and click “fill page”.
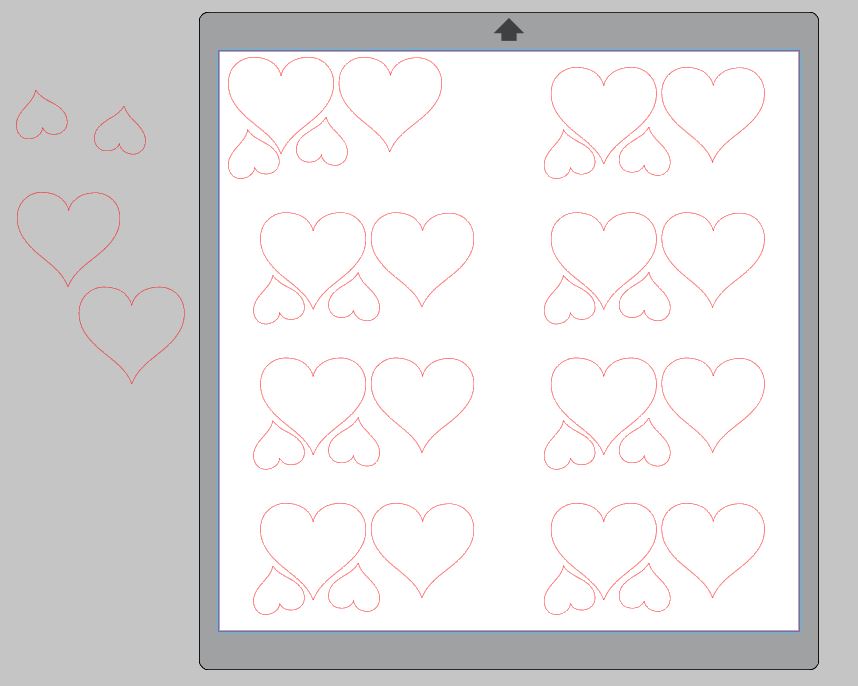
When you fill the page with the design, there are still large gaps between each item. This is a great way to waste product.
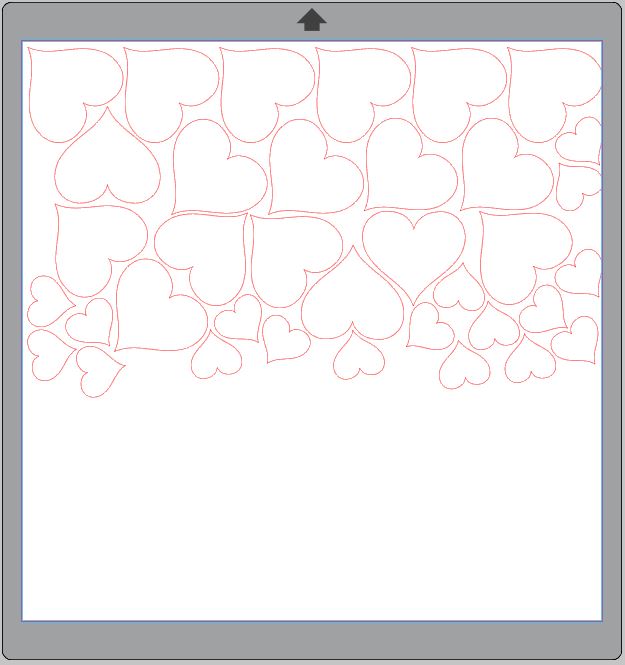
Check out the difference when I nest these same items. It takes up half the page instead of the entire sheet! I’m left with a usable scrap for another project.
How to use the nesting tool:
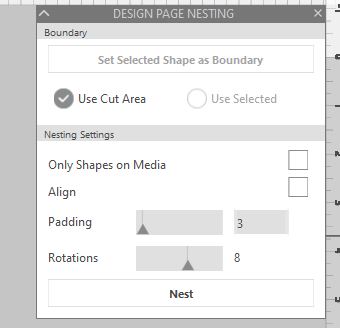
To make the most of your cutting area, select “use cut area” and then decide if all your designs are on or off your mat. If they are off your mat, unclick the box next to “only shapes on media.”
Decide how close together you want each design, this is the padding option.
Crank up the rotational options. This is how many times an object can be turned in an attempt to fit more items on the page, 6-8 is usually a good choice.
The last thing to do is hit nest and wait for the magic to happen. It’s that simple!
The nesting tool has saved me so many times. I can’t believe how much time I wasted in the past doing this manually. I hope you, too, will get a lot of great use out of the nesting tool.
Here is the video tutorial for how to use the nesting tool

