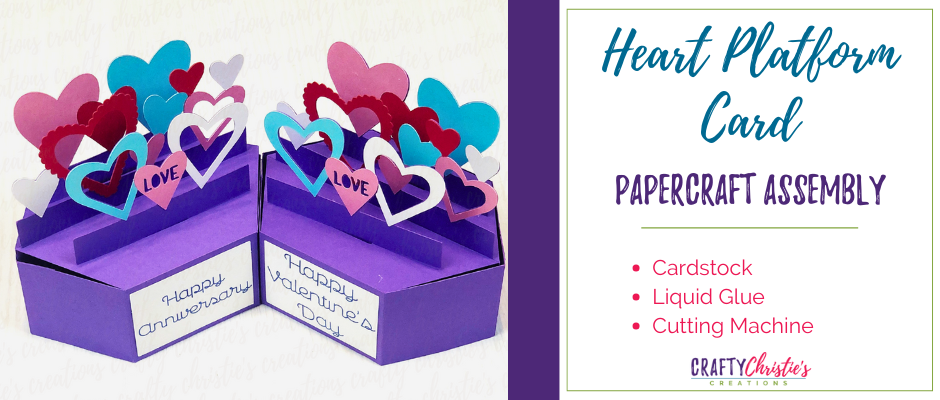
Looking for a unique way to share your love this Valentine’s Day? This heart platform box card is the perfect combination of elegance and practicality. With three distinct layers of hearts and the ability to fold flat for mailing, it’s sure to delight your special someone.
Supplies:
Heart Platform Card
Blue Cardstock
Pink Cardstock
White Cardstock
Purple Cardstock
Red Cardstock
Liquid Glue
Printer
Cameo 5
Electrostatic Mat
Base Layer Assembly: Paper Piecing
Start by organizing your cut pieces and matching them to their corresponding insert layers. The hearts are designed to puzzle-piece together, making assembly straightforward. Using liquid glue provides the flexibility to adjust positioning before the adhesive sets. Begin at the top edge of each piece and work your way down, ensuring proper alignment.
Creating the Platform Mechanism
The platform base consists of two pieces. Fold all score lines on both platform pieces. Place insert #1 through the slit of one of the platform base pieces with the design facing you. Glue the bottom section below the scoreline. Repeat with insert #3, but with the flat side of the base facing you. Attach insert #2 to the flat side of base, ensuring it’s centered and flush at the bottom
Adding the Wrapper Edges
The wrapper pieces require careful attention to achieve proper folding. Fold all score lines on both wrapper pieces. Start with the longest side, attaching it to the glue tabs on the platform base. Ensure score lines align with base edges. Repeat this with the other wrapper and platform half.
Now glue the flat sides of the platform bases together. Then glue the wrapper edges together. Test the folding mechanism in both directions – popping the inserts up and down.
Final Touches on the Heart Platform Card
The card comes with optional print-and-cut text elements reading “Happy Valentine’s Day” or “Happy Anniversary.” These can be attached either flat or raised with foam dots. A blank template is also provided for custom messages.
Your completed card stands beautifully displayed while being perfectly sized to fit in a standard 5×7 envelope. The three-dimensional layers create an impressive display that’s sure to show your thoughtfulness and creativity this Valentine’s Day.
The versatility of this design makes it perfect for both Valentine’s Day and anniversaries, and the customizable text options allow you to make it uniquely personal for your recipient. With some patience and attention to detail, you’ll create a card that’s sure to be treasured.
Check out the video below for the complete assembly instructions.


